Thank You to my Friends and Followers!

Wednesday, November 7, 2018

Little Girl Birthday

Hello and welcome to my blog, all things beautiful!
 I hope your day is going well and you are finding some time to be creative.


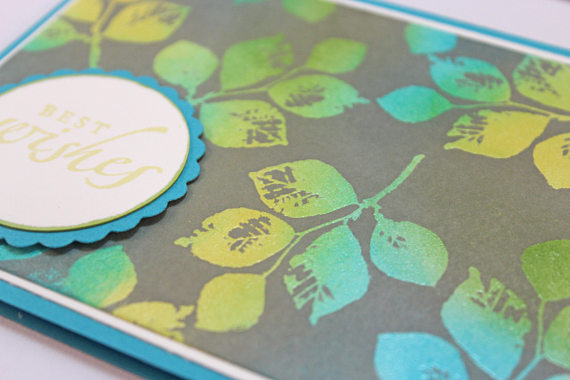
Today is a quick post. I made this card a while back and I'm just now getting it onto the blog. 

If you like to purchase my card you can find it here at my shop.
I grabbed some punches, patterned papers, gems 

I used Copic markers to color in the image, added the flowers, gems and metal butterfly accents.


I also stamped a coordinating envelope. it was my crafty goal this year to include a decorated envelope for each card and if possible some coordinating image inside the card too. So far so good on the resolution!

Have a Great day!


Thank you to my followers for always checking out my latest creation and Thank you if your visiting. Please consider following me. If you become a follower I'll send you a shout out on my
 Feature Friday post and link your blog so others can visit you too. You'll also be entered in my BLOG CANDY drawing.  Next drawing when I reach 250 followers!!!!!
( Unfortunately, there are some who have not posted in the comments or sent me the link to their blog in an email. I will not be hunting for your blog so if you don't post your blog address I won't be able to link it up)

* Love  * Encourage  * Communicate

Thursday, November 1, 2018

Masculine Window Birthday Card

Hey There! Welcome to All Things Beautiful!
 I hope your day is going well and you are finding some time to be creative.

Today's card is a window card; you can find a tutorial for making window cards under my tutorial tab or by clicking here

If you like to purchase my card you can find it here at my shop.

I die-cut the window, stamped the sentiment on a white background, cut a strip of card stock and used my small sewing machine to stitch directly onto it.

Here is a close up of the stitching and twine.

I thought it might be nce to carry the zig zag pattern onto the envelope with the chevron stamping.

Have a Great day!


Thank you to my followers for always checking out my latest creation and Thank you if your visiting. Please consider following me. If you become a follower I'll send you a shout out on my Feature Friday post and link your blog so others can visit you too. You'll also be entered in my BLOG CANDY drawing.  Next drawing when I reach 250 followers!!!!!
( Unfortunately, there are some who have not posted in the comments or sent me the link to their blog in an email. I will not be hunting for your blog so if you don't post your blog address I won't be able to link it up)

* Love  * Encourage  * Communicate

Monday, October 15, 2018

Butterfly Black Magic Card

Hello and welcome to All Things Beautiful!
Today 's card showcases a fun technique.
This card features the Black Magic coloring technique. If you haven't tried this technique yet and would like to you can find a tutorial under my tutorial tab here.

You can also purchase this card and others like it over at my Burnish and Brayer shop here.

I used a patterned strip as my focal point. Adding the ribbon and the die-cut sentiment.


Here is a close up of the black magic panel.


I also stamped a coordinating envelope. it was my crafty goal this year to include a decorated envelope for each card and if possible some coordinating image inside the card too. Yeah! keep up the resolution!!

Products:
SOA Beautiful World Stamp Set
Inktense pencils Apple Green, Fuchsia, Aries Blue, Sun Yellow
Gina K Designs Lemon Yellow ink and card stock


Have a wonderful crafty day!


Thank you to my followers for always checking out my latest creation and Thank you if your visiting. Please consider following me. If you become a follower I'll send you a shout out on my Feature Friday post and link your blog so others can visit you too. You'll be entered in my BLOG CANDY drawing.  Next drawing when I reach 250 followers!!!!!
( Unfortunately, there are some who have not posted in the comments or sent me the link to their blog in an email. I will not be hunting for your blog so if you don't post your blog address I won't be able to link it up)

* Love  * Encourage  *Communicate

Thursday, October 11, 2018

Fall Pocket Letter

 i There! Welcome to All Things Beautiful!
Today is a Pocket Letter post. If you've never made a Pocket Letter and want to know more you can check out the tutorial I have posted under my Tutorial tab.
Anyhoo, I made 2 fall Pocket letters this time. I figured while I was taking the time to make all the layered Cricut cut-outs i might as well make 2.


Here is a sample of the accordion fold pocket card I included


 Here is a mini manila folder with a few goodies I tucked inside.


 I made a little mini notebook, a shaker window, a mini coin envelope and a mini greeting card.


 Here is a close up of some more of the pocket goodness!

Hope you enjoyed my post on my fall pocket letter. I hope you give this fun project a try.

Have a wonderful day!

Thank you to my followers for always checking out my latest creation and Thank you if your visiting. Please consider following me. If you become a follower I'll send you a shout out on this weeks Feature Friday post and link your blog so others can visit you too. Oh and how could I forget--you'll be entered in my BLOG CANDY drawing.  Next drawing when I reach 250 followers!!!!!
( Unfortunately, there are some who have not posted in the comments or sent me the link to their blog in an email. I will not be hunting for your blog so if you don't post your blog address I won't be able to link it up)

Thursday, September 20, 2018

Nuetral Tri-fold Gift Card holder

Hello and welcome to all things beautiful! 
I am so glad you've stopped by for a visit. 
I hope you are inspired and learn a trick or two.

Today's post is a Tri-fold Gift card holder. If you'd like to give this technique a try you can find the tutorial I used under my tutorial tab or by clicking here


Products:
Gina K Designs Black Onyx card stock 
Stampin' Up Crumb cake card stock
My Minds Eye The Station 6 x 6 paper stack


Have a wonderful day!

Thank you to my followers for always checking out my latest creation and Thank you if your visiting. Please consider following me. If you become a follower I'll send you a shout out on this weeks Feature Friday post and link your blog so others can visit you too. Oh and how could I forget--you'll be entered in my BLOG CANDY drawing.  Next drawing when I reach 250 followers!!!!!
( Unfortunately, there are some who have not posted in the comments or sent me the link to their blog in an email. I will not be hunting for your blog so if you don't post your blog address I won't be able to link it up)

Saturday, September 15, 2018

Best Wishes Joseph's Coat Card

Howdy and Hello Crafty friends! Thank you for stopping by to see my latest card post. 
Today 's card showcases a very unique technique.

Today we are looking at the Joseph's coatmy tutorial tab here.
technique. If you haven't tried this technique yet and would like to you can find a tutorial under

You can also purchase this card and others like it over at my Burnish and Brayer shop here.

For this techniue you must create your background panel first and then heat emboss clear with our stamp images


Here is a closer look at the embossing and die-cut sentiment layers.


I also stamped a coordinating envelope. It was my crafty goal this year to include a decorated envelope for each card and if possible some coordinating image inside the card too. So far so good on the resolution!


Products:
Gina K Designs Jelly Bean Green, Lemon Yellow and Blue Lagoon and Midnight Fog ink
Stampin' Up Kinda Eclectic stamp
Gina K Blue Lagoon card stock
Stampin' Up Sincere Salutations
Wow clear embossing powder


Have a beautiful, memorable day!


Thank you to my followers for always checking out my latest creation and Thank you if your visiting. Please consider following me. If you become a follower I'll send you a shout out on my Feature Friday post and link your blog so others can visit you too. You'll be entered in my BLOG CANDY drawing.  Next drawing when I reach 250 followers!!!!!
( Unfortunately, there are some who have not posted in the comments or sent me the link to their blog in an email. I will not be hunting for your blog so if you don't post your blog address I won't be able to link it up)

* Love  * Encourage  *Com

Thursday, September 13, 2018

Kids Tri-fold Gift Card Holder

Hello and welcome to All Things Beautiful!
Today I am showcasing a Tri-fold gift- card holder.
If you''d like to try this technique you can find the tutorial I used under my tutorial tab here.

This gift card holder is pretty darn sturdy. All the layers make it really durable.

I didn;t decorate the inside but you certainly could stamp a sentiment inside or make the paper plain white for a hand written message.


Products:
Gina K Designs Wild Dandelion & Ocean mist card stock
American Crafts Hip Hip Hooray 6 x 6 paper stack


Hope tyou give this technique a try! Have a a great weekend!

Thank you to my followers for always checking out my latest creation and Thank you if your visiting. Please consider following me. If you become a follower I'll send you a shout out on this weeks Feature Friday post and link your blog so others can visit you too. Oh and how could I forget--you'll be entered in my BLOG CANDY drawing.  Next drawing when I reach 250 followers!!!!!
( Unfortunately, there are some who have not posted in the comments or sent me the link to their blog in an email. I will not be hunting for your blog so if you don't post your blog address I won't be able to link it up)

Friday, September 7, 2018

Thank You Black Magic Technique

Hello and welcome to All Things Beautiful!
Today 's card showcases a fun technique.
This card features the Black Magic coloring technique. If you haven't tried this technique yet and would like to you can find a tutorial under my tutorial tab here.

You can also purchase this card and others like it over at my Burnish and Brayer shop here.

I used a scallop dies to find my focal point. Add the die-cut sentiment.


Here is a close up of the black magic panel.


I also stamped a coordinating envelope. it was my crafty goal this year to include a decorated envelope for each card and if possible some coordinating image inside the card too. So far so good on the resolution!

Products:
Gina K designs Sending Love Stamp
Inktense pencils - Sherbet Lemon, Tangerine, Sun Yellow, Wright Blue
Darice Scallop Die
Gina K Designs Jelly Bean Green card stock and ink


Have a wonderful crafty day!


Thank you to my followers for always checking out my latest creation and Thank you if your visiting. Please consider following me. If you become a follower I'll send you a shout out on my Feature Friday post and link your blog so others can visit you too. You'll be entered in my BLOG CANDY drawing.  Next drawing when I reach 250 followers!!!!!
( Unfortunately, there are some who have not posted in the comments or sent me the link to their blog in an email. I will not be hunting for your blog so if you don't post your blog address I won't be able to link it up)

* Love  * Encourage  *Communicate

Wednesday, September 5, 2018

Masculine Stenciled Birthday card

Welcome to my little space on the blog sphere!
 I hope your day is going well and you are finding some time to be creative.

Today is a quick post showcasing a Clean and Simple Masculine card design.

For today's card I grabbed a fairly geometric stencil and used it throughout the card. 
I used the same ink and stencil slightly differently on the card front, the card inside and the envelope.
If you'd like to learn some basic stencil techniques you can find a stencil tutorial under my tutorial tab here.


 I also cut out the sentiment several times on my Cricut and layered them up to give it dimension.I kept the design fairly CAS. but also wanted to keep some continuity throughout the design.

Listed below are the products I used.

Products:
Prima Spark stencil
Ranger Distress ink Rusty Hinge
Cricut Happy Birthday sentiment cut at 1 1/2 inches
Gina K Designs Warm Cocoa cardstock
FGina K Designs In the Navy ink
Stampin' Up Special Celebrations stamp set

Have a wonderful day!

Thank you to my followers for always checking out my latest creation and Thank you if your visiting. Please consider following me. If you become a follower I'll send you a shout out on this weeks Feature Friday post and link your blog so others can visit you too. Oh and how could I forget--you'll be entered in my BLOG CANDY drawing.  Next drawing when I reach 250 followers!!!!!
( Unfortunately, there are some who have not posted in the comments or sent me the link to their blog in an email. I will not be hunting for your blog so if you don't post your blog address I won't be able to link it up)


Wednesday, August 29, 2018

Polka Dot Double Pocket Card

Hello! I hope your day is going well and welcome to All Things Beautiful
Today's post is a kids fancy fold card using the Double pocket Technique. If you haven;t tried it you can find a tutorial on how to make it under my Tutorial tab here.

For this card you'll want to use double sided patterned paper because both sides will be seen.

I added some fun tags/bookmarks for the recipient but you could enclose any variety of things in these pockets, cash, gift cards or what ever little trinket can fit inside.


Products:
Gina K Designs Denim Blue card stock
Bella paper boy Papery 12 x 12 sheet patterned paper
Gina K Designs Red Hot, Dandelion Yellow, Denim Blue, Orange Mango, & Blue Lagoon ink
Gina K Designs Pretty Patterns stamp set
MFT For the boys stamp set
Simon Says Stamp Lots of Stars stamp set

Have a wonderful week!

Thank you to my followers for always checking out my latest creation and Thank you if your visiting. Please consider following me. If you become a follower I'll send you a shout out on this weeks Feature Friday post and link your blog so others can visit you too. Oh and how could I forget--you'll be entered in my BLOG CANDY drawing.  Next drawing when I reach 250 followers!!!!!
( Unfortunately, there are some who have not posted in the comments or sent me the link to their blog in an email. I will not be hunting for your blog so if you don't post your blog address I won't be able to link it up)

Monday, August 27, 2018

Sending Birthday Wishes Suspended Window Card

Hello and welcome to All Things Beautiful!
Today 's card showcases a fun technique.
This card features the Suspended Window technique. If you haven't tried this technique yet and would like to you can find a tutorial under my tutorial tab here.

You can also purchase this card and others like it over at my Burnish and Brayer shop here.


I also stamped a coordinating envelope. it was my crafty goal this year to include a decorated envelope for each card and if possible some coordinating image inside the card too. Yeah! Keeping up the resolution!!

Products:
My Mind's Eye Happy Day 6 x6 paper stack
Gina K Designs Bubblegum Pink card stock
Spellbiners Standard Circle Dies
Gina K Designs Bubble Gun Pink and Sweet Corn ink
Recollections Asian inspired stamps


Have a wonderful crafty day!


Thank you to my followers for always checking out my latest creation and Thank you if your visiting. Please consider following me. If you become a follower I'll send you a shout out on my Feature Friday post and link your blog so others can visit you too. You'll be entered in my BLOG CANDY drawing.  Next drawing when I reach 250 followers!!!!!
( Unfortunately, there are some who have not posted in the comments or sent me the link to their blog in an email. I will not be hunting for your blog so if you don't post your blog address I won't be able to link it up)

* Love  * Encourage  *Communicate


Friday, August 24, 2018

Floral Joseph's Coat Card

Howdy and Hello Crafty friends! Thank you for stopping by to see my latest card post. 
Today 's card showcases a very unique technique.

Today we are looking at the Joseph's coatmy tutorial tab here.
technique. If you haven't tried this technique yet and would like to you can find a tutorial under

You can also purchase this card and others like it over at my Burnish and Brayer shop here.

For this techniue you must create your background panel first and then heat emboss clear with our stamp images

Here is a closer look at the embossing, die-cut sentiment and ribbon.


I also stamped a coordinating envelope. It was my crafty goal this year to include a decorated envelope for each card and if possible some coordinating image inside the card too. So far so good on the resolution!

Products:
Gina K Designs Passionate Pink, Sweet Corn, Chocolate Brown, Tomato Soup ink
Stampin' Up Posy Punch stamp
Gina K Designs Sweet Corn card stock
Stampin' Up Sincere Salutations stamp

Have a beautiful, memorable day!


Thank you to my followers for always checking out my latest creation and Thank you if your visiting. Please consider following me. If you become a follower I'll send you a shout out on my Feature Friday post and link your blog so others can visit you too. You'll be entered in my BLOG CANDY drawing.  Next drawing when I reach 250 followers!!!!!
( Unfortunately, there are some who have not posted in the comments or sent me the link to their blog in an email. I will not be hunting for your blog so if you don't post your blog address I won't be able to link it up)

* Love  * Encourage  *Communicate